Automate a website
Kitewell can work a website for you: open pages, sign in, click and type, upload files, read what a page shows, and pass what it found to the next step. You write what to do in ordinary words, and a model works out how to do it on each page. There is nothing to record and no selectors to write.
Work it takes off your hands:
- Download this month’s invoices from a supplier portal.
- Upload the receipts an email brought into your accounting software.
- Look up the status of every order in a spreadsheet.
- Copy figures from a web dashboard into a daily report.
- Fill in the same web form for each row of a list.
- Check that a site’s sign-in and checkout still work after a release.
The browser runs on your own computer, and a sign-in it makes stays on that computer.
What you need
Section titled “What you need”A browser on this computer. On a Mac, install Google Chrome in
/Applications. On Windows, Kitewell uses the Chrome or Microsoft Edge that
is already installed. To use Chromium, Brave, Edge on a Mac, or a Chrome kept
somewhere else, give its full path in
Device settings → Browser → Browser executable. The step says whether a
browser was found, and which one it will open.
A model. A website step asks an API model what to do on each page. Add one under Agents & models, then pick it in the step’s Model — or set one for the whole workflow in Settings → Execution & retries → Default model for browser and desktop steps. Use an Anthropic, OpenAI, or Gemini model. Small local models usually cannot drive a browser.
Then choose Check the browser, on the step or in Device settings. It opens the browser once from Kitewell’s background service, the way a run does, so a browser that cannot start turns up now instead of in the middle of a scheduled run. On a Mac it also lets macOS ask its questions while you are there to answer them.
Build your first website step
Section titled “Build your first website step”This example looks up an order on a shop’s site and hands its status to the next step.
-
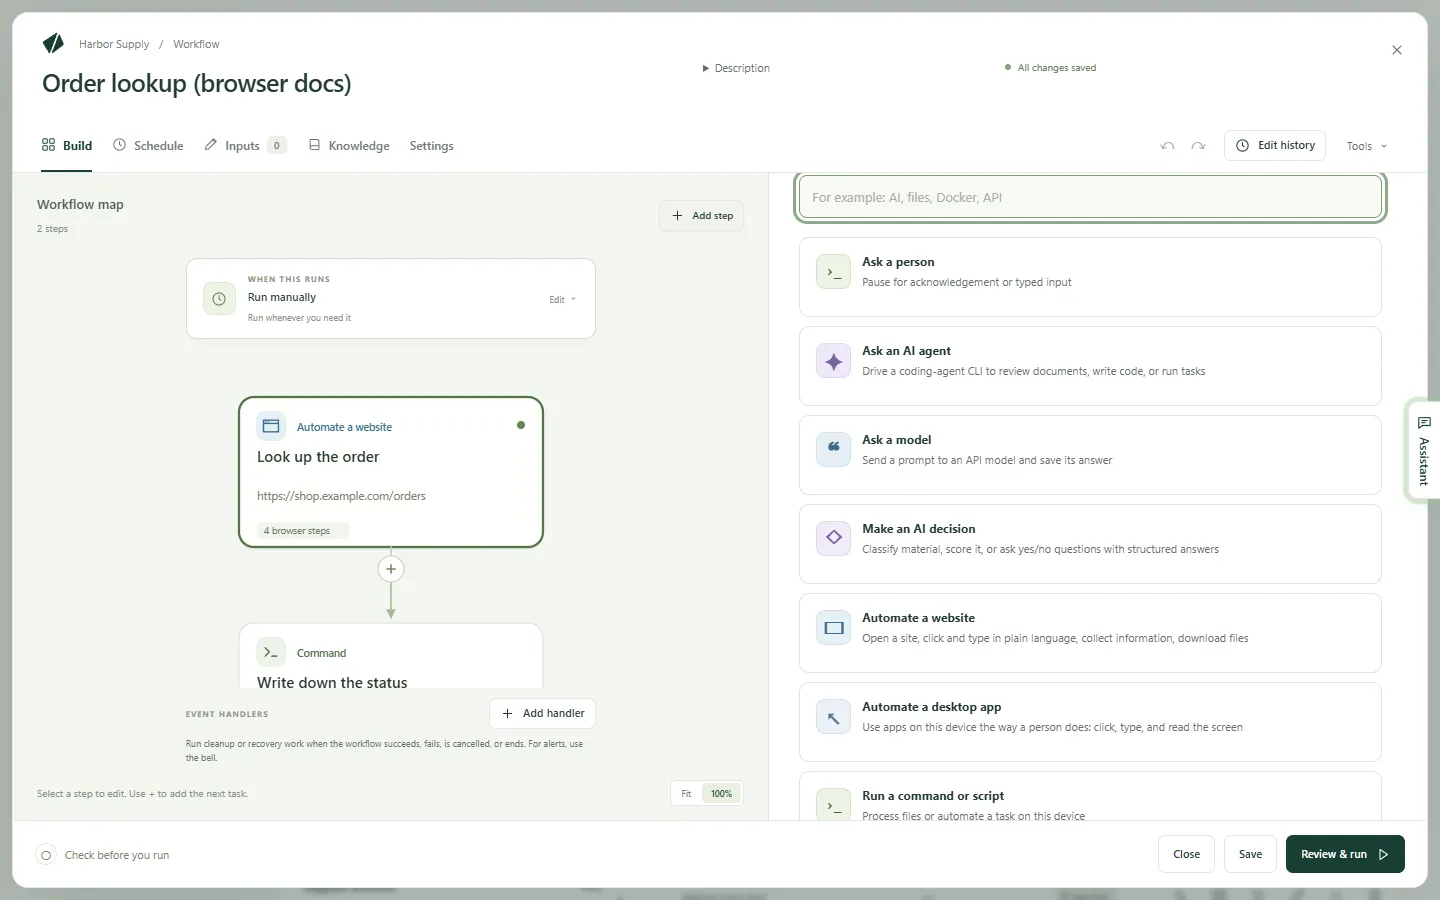
Open a workflow and choose Add step. The task picker opens.
-
Choose Automate a website. Give it a Step name such as
Look up the order. Under Technical settings, Step identifier is the short name later steps use to read what this step collects; make it something plain, such asorder. -
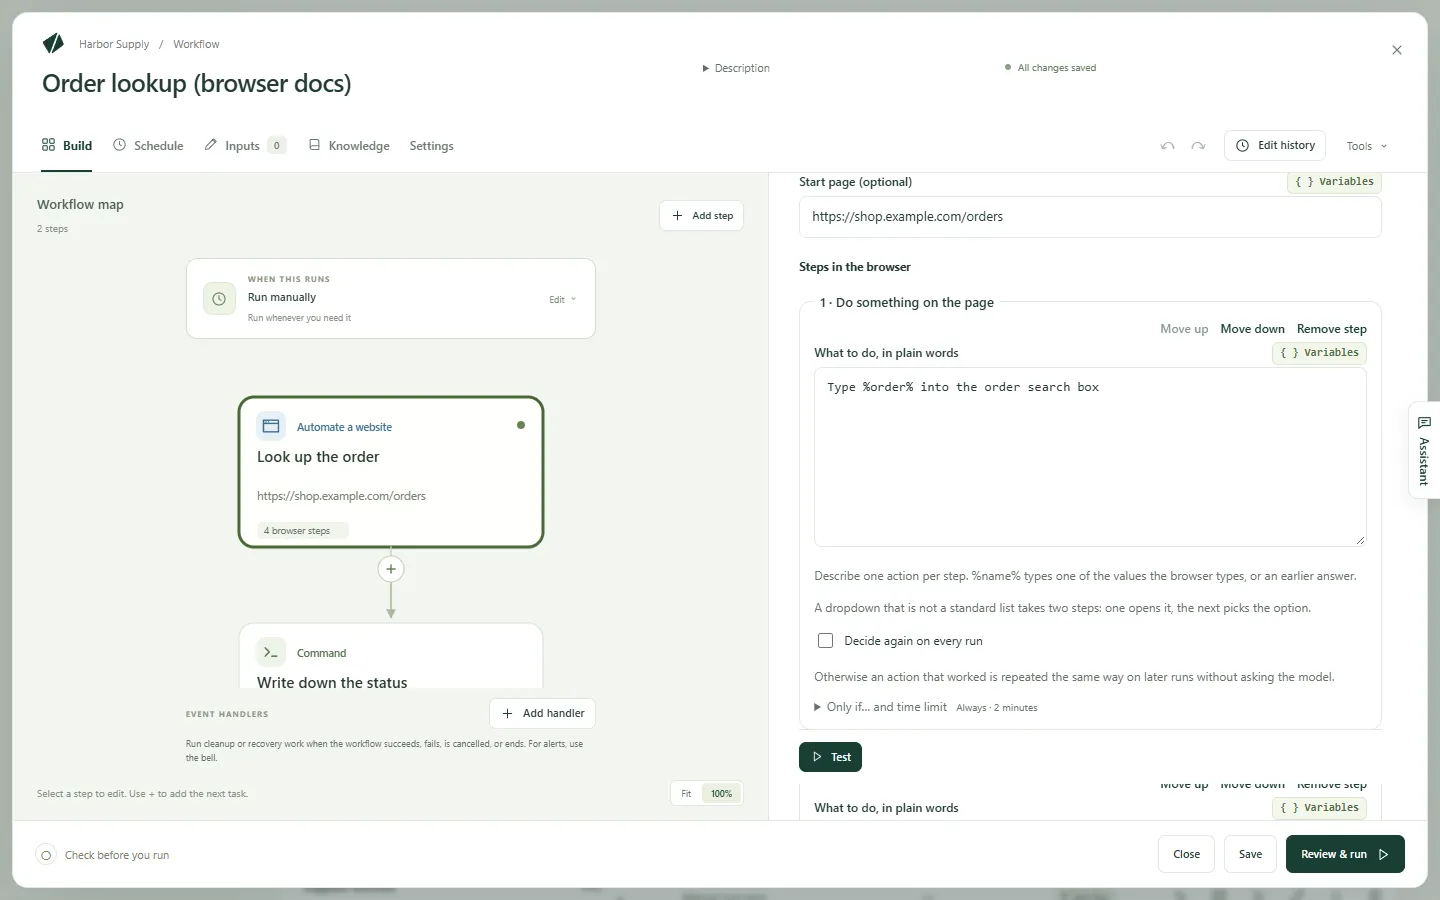
Choose the Model, and set Start page (optional) to the page to begin on, such as
https://shop.example.com/orders. -
Under Values the browser types, choose Add a value, name it
order, and set its Value to the order number. It can be typed text, a workflow input, or a secret — a password or key stored so it never shows in a log. -
Under Steps in the browser, use Add a browser step to add, in order:
- Do something on the page, with What to do, in plain words set to
Type %order% into the order search box - Do something on the page, with
Click the Search button - Make sure that…, with The page should… set to
The order's details are shown - Collect information, with What to look for set to
The order's status and the expected delivery date, and two values under What to collect:statusanddelivery, each with Type set to Text
- Do something on the page, with What to do, in plain words set to
-
Open Browser settings, turn on Show the browser window, then choose Test to watch the step work on its own.
-
Add a later step that uses what it collected, written as
${steps.order.outputs.status}.
In a new workflow, Or start from an example offers two website examples to copy instead: Collect data from a website and Sign in once, then collect.
Write instructions the model can follow
Section titled “Write instructions the model can follow”One instruction, one action. A Do something on the page step carries out
only its first action, so Type the code and click Continue stops after the
typing. Write two steps instead.
A dropdown that is not a plain list also takes two steps: one opens it, the next picks the option.
Name what is on the page, the way you would to a colleague:
Click Download next to the latest invoiceType %customer% into the Customer fieldOpen the Reports menu
A step that collects describes what you want rather than an action:
The order number and total on the confirmation page. Say what the value is,
not where it sits on the screen.
What a website step can do
Section titled “What a website step can do”The steps inside run in order, in one browser.
- Open a page goes to a Web address.
- Do something on the page does one thing, written under
What to do, in plain words.
%name%types one of the values the browser types, or an answer you gave earlier. - Upload files gives files on this computer to the page. See Upload files.
- Collect information reads What to look for and fills in the values
under What to collect. Each value has a Name, a Type — Text,
Number, Yes or no, List, or List of items — and a
Description (optional) that tells the model what it is. A
List of items sets out what Each item holds, such as a listing’s
url,title, andprice. Later steps read each value as${steps.<identifier>.outputs.<name>}. - Make sure that… fails the step when the page does not look right. How to check picks how. In plain words (the model judges) reads The page should… and asks the model. Page contains the text, Address contains, and Element appears (CSS selector) read the page themselves, with no model and the same answer on every run. Keep checking for (optional) gives the page time to get there.
- Wait waits For a fixed time, under How long, or Until an element appears (CSS selector).
- Take a screenshot saves a PNG with the run’s files, under the Screenshot name you give it.
- Ask me for input shows your Question to show you and pauses the run until you answer — for a one-time code, say. Use the answer as names the answer so later steps can type it.
Every step also has Only if… and time limit, which runs it only when a condition holds and caps how long it may take. A step with neither set takes at most two minutes.
Keep passwords out of the model
Section titled “Keep passwords out of the model”Values the browser types holds whatever the step types: a customer number,
a workflow input, a password. The instructions name each one as %name%, and
the model only ever sees that name.
For anything sensitive, choose a secret as the value. It stays out of the instructions, out of the model, and out of the logs. An instruction that spells out a secret’s value fails rather than send it, and Review & run says so before you run.
Upload files
Section titled “Upload files”Upload files puts files from this computer into a page’s file field, the way you would by choosing them in a file picker, such as receipts into an accounting tool’s file box or a signed form into a portal.
- Files to upload · one per line takes full paths, such as
~/Documents/invoice.pdf; patterns, such as~/Downloads/*.pdf; or a result of an earlier step that lists files. An email step that finds messages with Save attachments into the run’s files turned on lists their attachments, so writing${steps.<identifier>.outputs.messages}uploads what the emails brought. - Where to upload (optional) names the file field, or the button or drop
area that opens the file picker, in plain words:
The receipt drop area. The model finds it once, and later runs reuse what it found. Leave it empty when the page has only one file field; then no model is asked at all. - Find it again on every run asks the model each time instead, for a page whose upload area moves around.
The file picker never opens on screen, and the model never sees the files,
their names, or where they are. A site that takes one file at a time fails
the step when given several; upload them in separate steps, or run the step
once per file. Each file can be up to 50 MB. Sites send what they were given
in the background, so follow the upload with a Make sure that… check for
what the site shows when it is done, such as Page contains the text
Uploaded, with Keep checking for (optional) set to a minute.
When the assistant builds an upload, it tries it in its own browser first and asks you before any file goes to a site, naming the site and each file. The same goes for a trial of a workflow that uploads.
Sign in once and stay signed in
Section titled “Sign in once and stay signed in”Turn on Stay signed in between runs in Browser settings. Cookies and sign-in state stay on this computer, so the next run opens the site already signed in. The Sign in once, then collect example starts this way: its first step shows the window and waits while you sign in yourself, and every step and run after it reuses that sign-in.
Project settings → Storage → Sign-ins lists what is saved, which workflows use each one, and Forget sign-in… to drop one. Backups do not carry a sign-in, so a restored computer signs in again, as it asks for your secrets again.
A loop that runs its items at the same time cannot share one sign-in. Set the loop to one item at a time, or turn Stay signed in between runs off.
Sites that ask for a certificate
Section titled “Sites that ask for a certificate”Some sites, such as company or government portals, ask the browser for a client certificate before they open. Add the certificate to Kitewell once, and every website step and the assistant’s browser on this computer present it to the sites you name, without the system asking for its password.
- Open Device settings → Browser → Client certificates.
- Choose Add from a file… for a
.pfxor.p12file and enter its Password. In the Kitewell app, Add from this computer… picks one from the macOS keychain or the Windows certificate store instead; the system may ask once to let Kitewell copy it. - Under Use it for, choose Only these sites and list them under
Sites, one per line, such as
portal.example.com, or*.example.comfor every site under it. Every site that asks for a certificate gives it to any site that asks. - Choose Add certificate, then Check a site to open one with it.
A step needs no setting of its own. When a run fails because a site asked for a certificate, the failed run offers an administrator a way to add one for that site, or to use one already added, and then Retry run.
Only website steps and the assistant’s browser present it. A desktop step works the browser on your screen, which asks you to choose a certificate itself and waits for an answer, so automate such a site with a website step.
Kitewell keeps the certificate on this computer under a password of its own, never yours, and leaves it out of backups. Adding or changing one restarts the project engines; runs in progress continue. Kitewell’s chat warns a month and a week before a certificate expires, and when it does.
What a run looks like
Section titled “What a run looks like”Open the run under Runs & logs. What the browser did lists the steps in order with the screenshots they took, beside the Model that was asked and Model usage, the tokens that went in and out.
Ran without AI says how many of the step’s operations ran without asking the model: a replayed action, a check that reads the page itself, or an operation such as opening a page. An action that worked once is remembered and repeated the same way next time, and a replayed action sends nothing to the model.
When the site changes and a remembered action no longer works, the model is asked again. Decide again on every run, on one step, turns that off, and Project settings → Storage → Replay cache clears what a workflow remembers after a site is redesigned. Collect information and checks written in plain words ask the model every run.
When a step reaches Ask me for input, the run waits. Open it under Runs & logs → Waiting, or from the notification, type into Your answer, and choose Answer — or Reject to fail the step. The answer is kept with the run, so use it for codes that expire, not for passwords. If the browser closed before you got there, Restart the browser step runs the step again from its first step.
Run it for many items
Section titled “Run it for many items”- A list in a spreadsheet: give the workflow an input such as the order number, then run it from a batch sheet, one row per item. The sheet shows progress, failures, and time left.
- A list the site shows: collect a List of items, such as every result in a search, and let it fill a sheet’s rows. Refreshing adds new ones and marks those that are gone.
- A list inside one run: put the step in a For each item loop.
- On a schedule: add a schedule, leave Show the browser window off so Chrome does not open while you work, and let alerts tell you when a run fails or waits for an answer.
If something goes wrong
Section titled “If something goes wrong”Look at the step’s screenshots first: a sign-in wall, a cookie banner, or a bot check explains most failures. Then:
- The step says nothing on the page matches the instruction. Reword it to name what is on the page, or split it in two.
- An upload says no file picker opened. Name the file field itself in Where to upload (optional), or the button that opens the picker; when the upload sits behind a menu or a dialog, open it in a step before.
- The browser will not start. Run Check the browser, and if no browser was found, set Device settings → Browser → Browser executable.
- A site the step needs will not load. If you filled in Allowed websites · one per line (optional), every host the site uses has to be listed, including its sign-in and image servers.
The rest is in Troubleshooting.
Details
Section titled “Details”Browser settings, on the step, also holds Save screenshots —
When a step fails, When a step fails, and at the end,
After every step, or Never — and Window width and
Window height in pixels.
Allowed websites · one per line (optional) takes host names such as
example.com or *.example.com; local addresses, ports, and paths are
refused.
What reaches the model is the visible text and layout of the page, once for each action it decides, billed by the provider you chose. Replayed actions and checks that read the page directly send nothing, and neither do the values the browser types, the files it uploads, or your secrets. Uploaded files go to the site, as they would if you chose them yourself. See What leaves your computer.
Some sites refuse automated browsers. A saved sign-in and a start page past the cookie banner get around the usual cases; CAPTCHAs are not solved. The computer has to be awake for a scheduled run.
The workflow in Build your first website step
is two steps: Automate a website with a start page, one value named
order, two Do something on the page steps, one Make sure that…
check, and one Collect information step that reads the status and the
delivery date; then a later step that uses those two values.